
Account Verification
Retrieve bank data for account authentication and ownership verification.
Trustly lets users sign into their online banking accounts and allows merchants to retrieve and authenticate bank-qualified account information and verify that this information belongs to an account the user has access to. This data can then be tokenized and processed by merchants in their own platform, ensuring compliance and mitigating risk.
In this tutorial, you'll use the Trustly UI to retrieve a bank authorized transaction and then you'll use the transaction to retrieve verified user and account data. When you complete the tutorial, you'll know how to integrate Trustly into your platform and how to support Micro Challenge Deposits or add aggregated CashFlow data to your Trustly integration.
To complete this tutorial, you'll complete the following tasks:
- Integrate the Trustly UI to Create an Authorized Transaction.
- Retrieve a user's bank account and routing information by calling the Get Account Balance API.
- Retrieve additional user information (name, address, phone number) by calling the Get User API.
- Use the retrieved bank and user information for further processing or user registration.
Create an Authorized Transaction
Using the Trustly UI SDKsAs with most Trustly use cases, retrieving account data begins with acquiring a "Bank Authorization" from a user. This requires integrating a Trustly UI library in the user-facing client of your application. For a more detailed guide on these steps see the 📑 Trustly UI Guide and if you are integrating with a mobile application see the 📱Mobile Apps Guide.
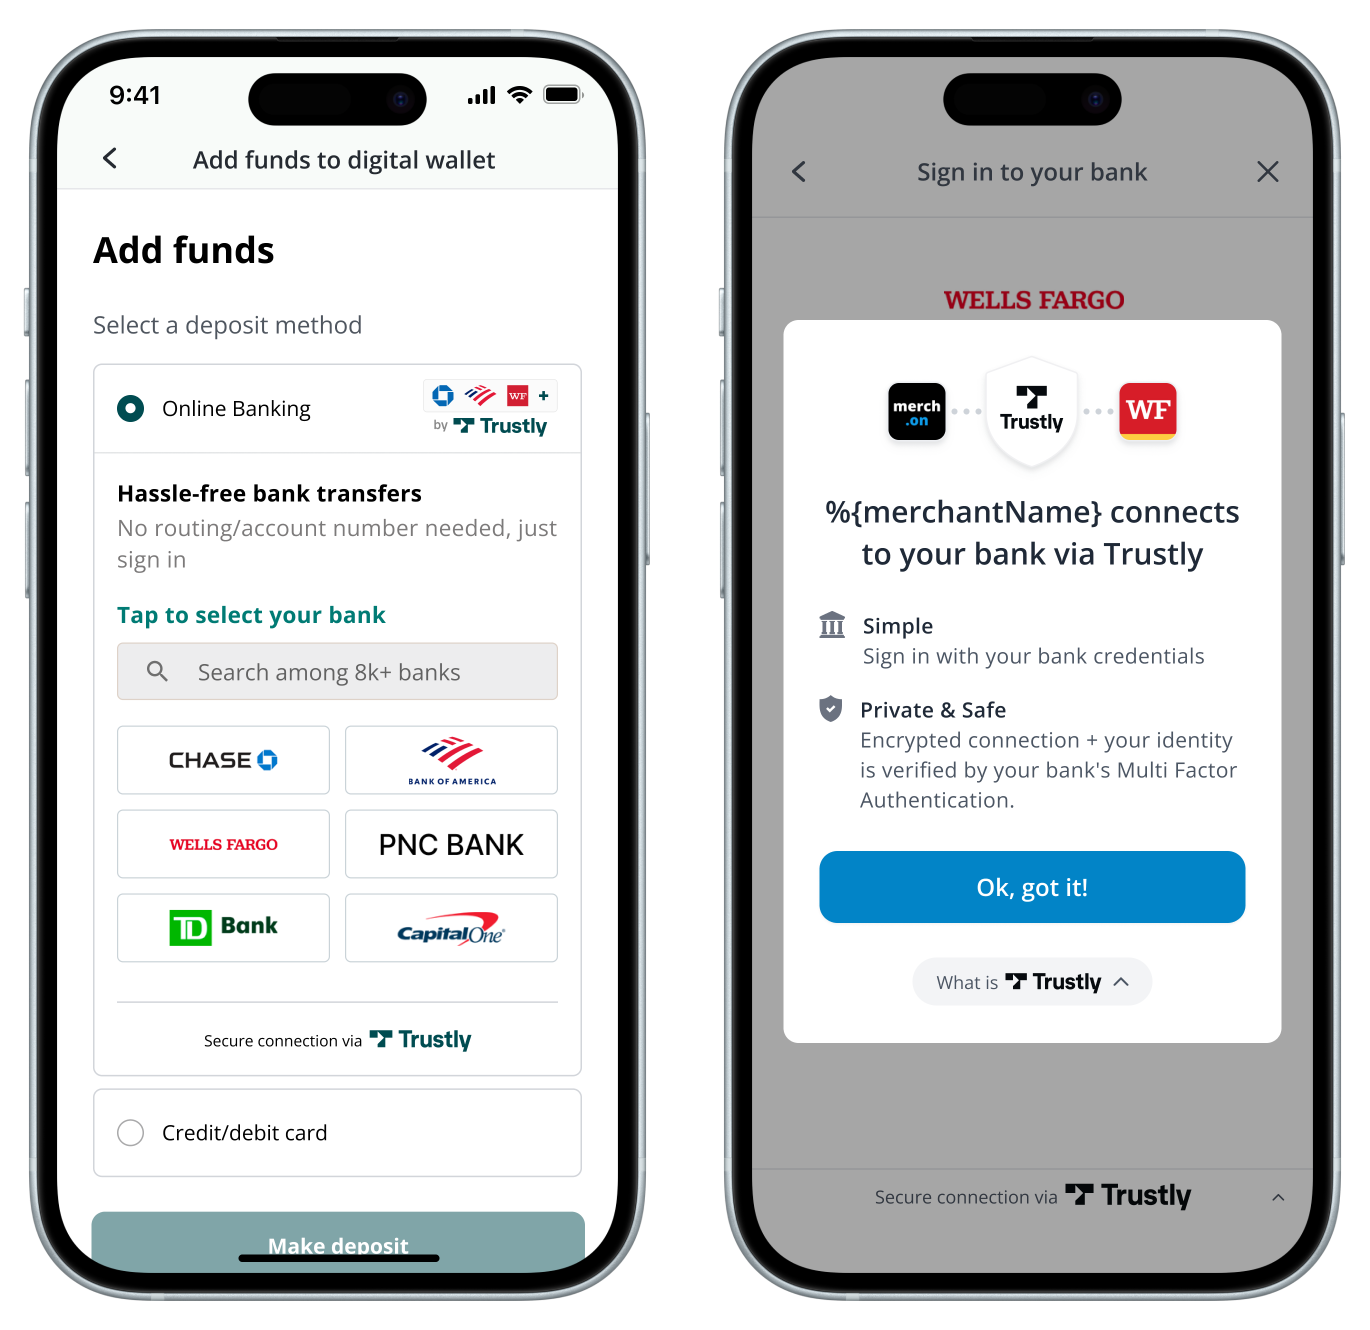
- In your website or mobile application, add the Trustly UI SDK to render the Select Bank Widget or launch the Lightbox.
- Define the data to be passed to Trustly and set the
paymentTypeproperty to the string"Retrieval"to create the correct transaction type. - When the Trustly Lightbox opens, the user selects their bank from the list, authenticates, and selects their account.
- After a successful authorization, the Lightbox will redirect the user to the
returnUrlprovided in the Establish Data. - Create a Redirect URL where your application server will collect the details of the new Trustly transaction, including the
transactionIdand other important properties to associate with the user who created the authorized transaction.
The following diagram shows the transaction authorization workflow:
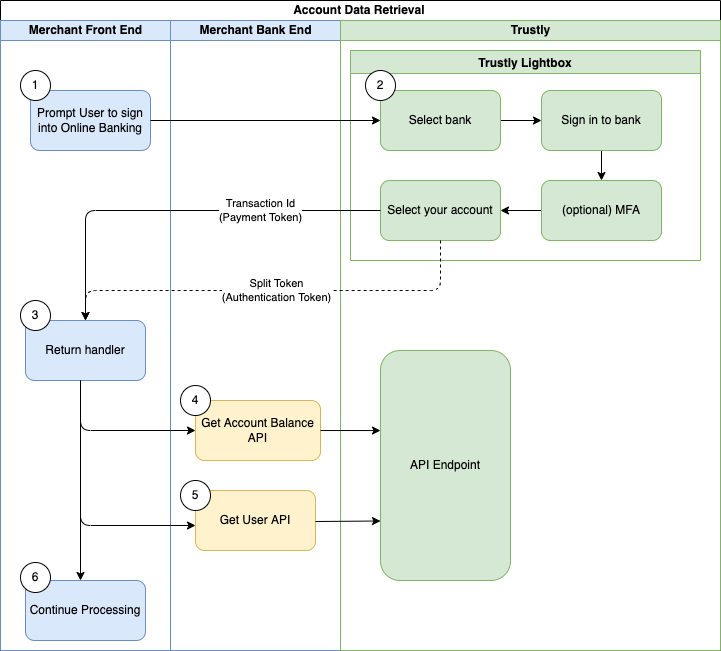
After successfully acquiring a Bank Authorization, the primary steps for retrieving account data are to to retrieve the users bank account and routing information and optionally retrieve additional user information such as name, address, email, etc.
Retrieve Bank and Account Information
Calling the Get User API allows you to get the banking information selected for a given transaction. You call the Get User API by executing a GET request to the Get Transaction endpoint Get Transaction endpoint, where {transactionId} is the Bank Account Authorization transaction id. For more information, see Get Account Balance.
Get Account Balance API
Wait for the Data Ready event!Every Account Data API call should be performed only after Data Ready event is received, which may take some minutes after the transaction is authorized. Calling the Account Data endpoints before it may result in incomplete analysis and/or data aggregation.
GET https://sandbox.trustly.com/api/v1/transactions/{transactionId}/payment/paymentProvider/account/balanceThe Get Account Balance call returns a JSON response with Bank Account data that you can use in your application. Relevant fields from the response include:
accountBalance.account.providerId: Trustly Identifier for the Bank selected. You can use this identifier to display the Bank logo to the User.accountBalance.account.nameOnAccount: Users name that is provided by the selected account.accountBalance.account.name: Name (friendly identifier) of the Users Bank Account.accountBalance.account.type: Type of Account selected (Checking or Savings).accountBalance.account.accountNumber: Bank Account Number provided by the selected account.accountBalance.account.iban: IBAN provided by the selected account.accountBalance.account.routingNumber: Bank Routing Number provided by the selected account. RTN on U.S and Sort Code on Europe.
This example has been abbreviated. For more information, see Get Account Balance.
{
    "accountBalance": {
        "account": {
            "providerId": "200005501",
            "paymentProvider": {
                "paymentProviderId": "200005501"
            },
            "nameOnAccount": "John Smith",
            "name": "Demo Checking Account",
            "type": 1,
            "profile": 1,
            "accountNumber": "123456576",
            "routingNumber": "124003116",
            "verified": true,
            "verification": {
                "verified": true,
                "type": 2,
                "hasEnoughFunds": true,
                "verificationDate": 1561162678111
            }
        }
    }
}
You can then use this information to display the selected Payment Method to your user and use the provided Account and Routing number in your application.
Note on Data FreshnessIf a significant amount of time has passed since the user authorized the transaction, call the Refresh Transaction API prior to using the Get Account Balance API to ensure the data provided by the API is up to date.

Retrieve User Information
The Get User API allows you to retrieve the personal information (name, address, phone, email, etc.) of the user from their selected bank account. This data can be used to pre-fill registration information or any other required information typically entered manually by your user.
Execute a GET request to the Get User endpoint, replacing the {transactionId} path parameter with the transactionId of the Bank Account Authorization created in the Create an Authorized Transaction step.
Get User API
Data Ready Event NotificationWarning, calling any of the Account Data APIs for a new authorization transaction prior to receiving the
DataReadyevent can result in partial data being returned.To ensure optimal performance, wait to receive the
DataReadyevent prior to making a request to an calling an Account Data API.
GET https://sandbox.trustly.com/api/v1/transactions/{transactionId}/payment/paymentProvider/userThe Get User call returns a JSON response with User data that you can use in your application. Relevant fields from the response include:
name: Name(s) associated with the Users Bank Account.address: Address(es) associated with the Users Bank Account.phone: Phone Number(s) associated with the Users Bank Account.email: Email Address(es) associated with the Users Bank Account.
This example may be abbreviated. Please refer to the Get User definition in the API Reference for more information.
{
  "user": {
    "name": [
      "John Smith",
      "Mary Smith"
    ],
    "address": [
      {
        "address1": "2000 Broadway Street",
        "address2": "",
        "city": "Redwood City",
        "state": "CA",
        "zip": "94063",
        "country": "US"
      },
      {
        "address1": "105 Alternate1 Street",
        "address2": "#401",
        "city": "Redmond",
        "state": "WA",
        "zip": "98052",
        "country": "US"
      },
    ],
    "phone": [
      "2145553434"
    ],
    "email": [
      "[email protected]"
    ],
  }
}
This information can be used to pre-fill or display the user's information in your user flow. You can also use this information to validate the personal information the user may have previously provided in your flow.

Conclusion
In this tutorial, you created an authorized transaction, and you retrieved bank, account and user information. Authenticating bank-qualified account information and verifying user access provides a secure and reliable solution for merchants looking to retrieve this type of information.
After completing this tutorial, visit the Testing Guide and the common Errors reference in order to handle edge cases your users may come across. Additionally, you may want to consider supporting Micro Challenge Deposits or adding aggregated CashFlow data to your Trustly integration for added benefits.
Updated 19 days ago
Review test cases and errors or add more functionality to your Trustly Data integration.