

Web (JavaScript)
To integrate the Trustly Lightbox into your web application, you must set up the JavaScript SDK. This process involves loading the library, configuring the UI options, and initializing the request.
Prerequisites
- Your backend must be configured to generate the
establishDatapayload andrequestSignature. See frontend integration for details on the client-server boundary and payload requirements. - You must have your
accessIdto initialize the script. You can find this in the Trustly Merchant Portal (Settings > Developer Settings). - Your development domain must be added to the allow list in your Trustly account settings.
Load the JavaScript library
-
Include the Trustly JavaScript library on every page where you intend to launch the Trustly Lightbox. Add the following
<script>tag to your application page’s<head>or immediately before the closing</body>tag:Sandbox:
Production:
-
Replace
YOUR_ACCESS_IDwith theaccessIdTrustly provides during onboarding.You must always load the script directly from
trustly.one. Do not download, bundle, or host the script from a custom domain.
Configure UI options
-
Pass a
TrustlyOptionsobject as the second argument toestablishorselectBankWidgetto customize the behavior and appearance of the Trustly Lightbox: -
Configure UI and callback parameters as needed for your integration:
Initialize the request
Call the SDK function to launch the UI. You can choose between the Select Bank Widget (inline) or the Establish (modal) function.
Select Bank Widget (embedded)
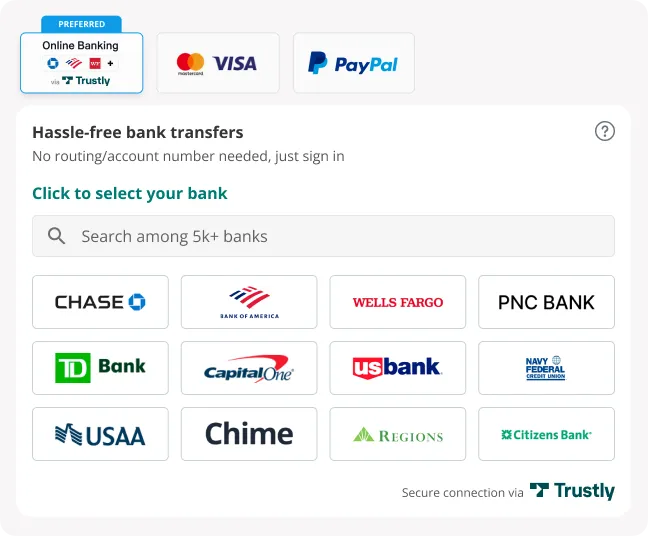
The Select Bank Widget is an optional, inline component that displays the most popular banks and provides a search field. Selecting a bank from the widget opens the Trustly Lightbox.
-
Add a container element (such as a
<div>) to your HTML layout where you want the widget to render. -
In your
TrustlyOptionsobject, specify awidgetContainerIdmatching the ID of your HTML container element. -
Call
Trustly.selectBankWidgetwith yourestablishDataandTrustlyOptions:
Launch the Lightbox (standard)
-
Add a checkout button (such as Pay with Trustly) to your application layout.
-
Configure your button’s click event listener to invoke
Trustly.establish(establishData, TrustlyOptions):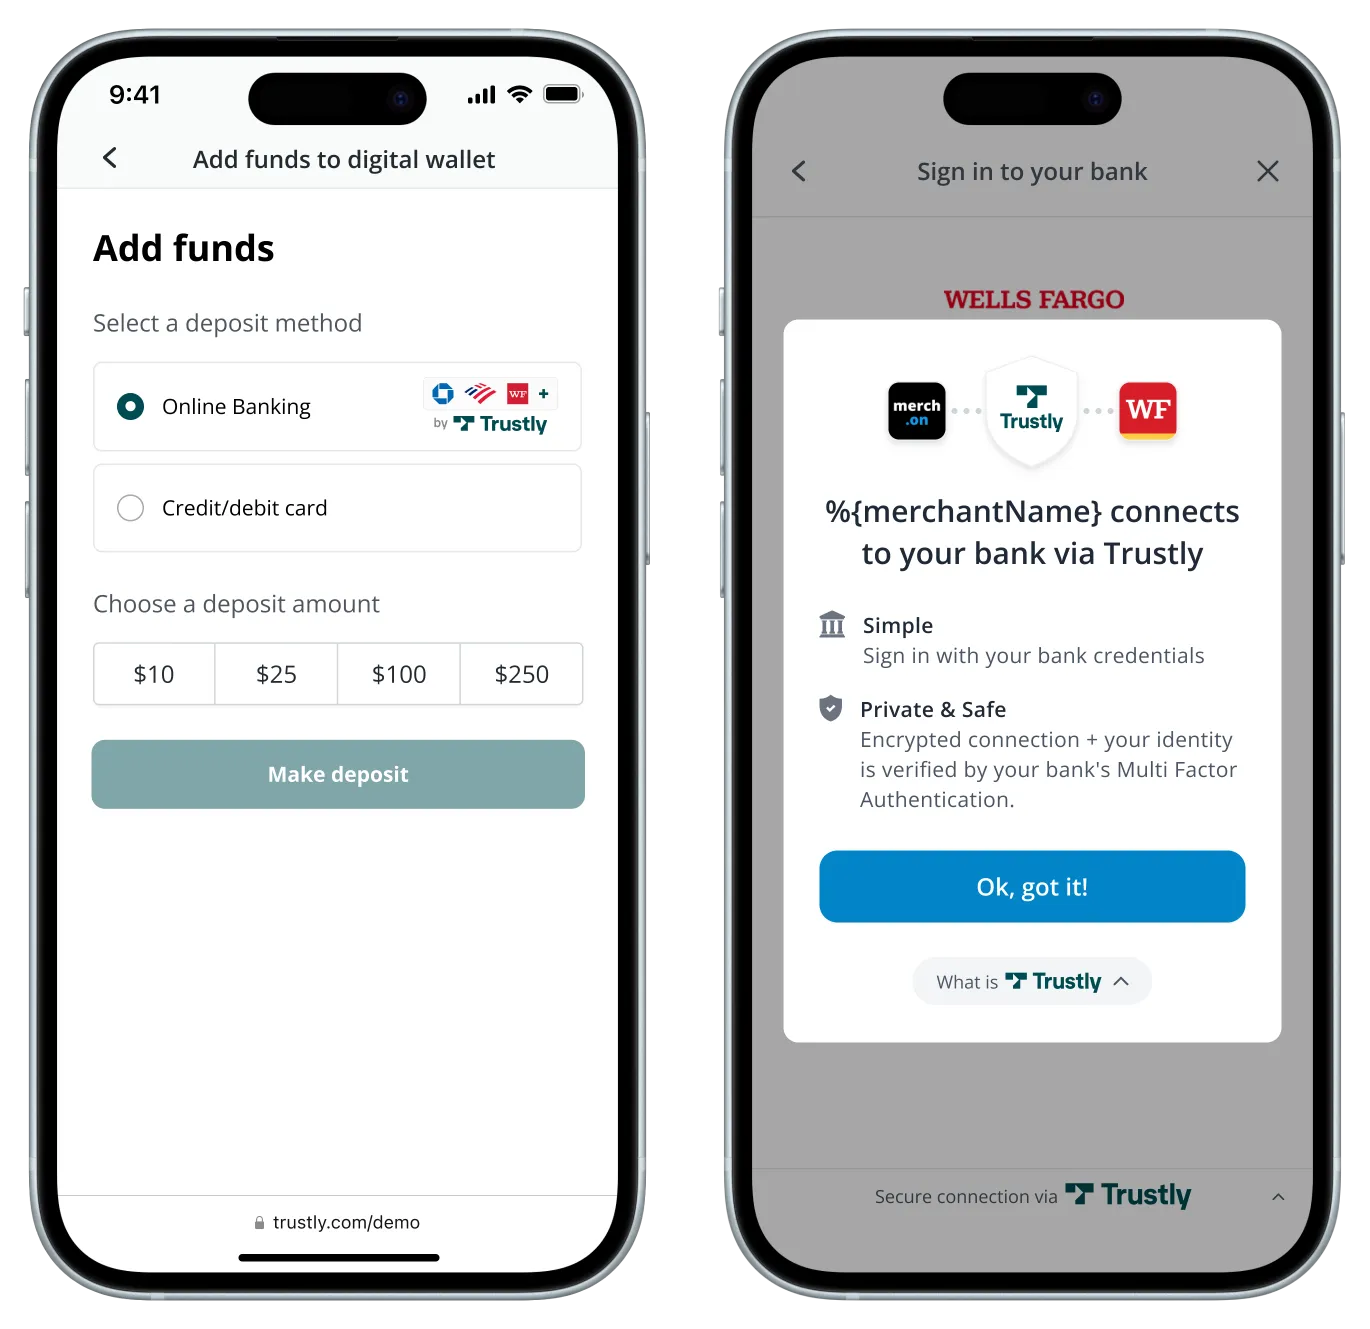
Embed branded buttons
If your integration uses the Express Checkout or Sign-In workflows, you must use Trustly’s hosted branded buttons to remain compliant with branding requirements. Do not create your own button images for these specific flows.
Trustly provides a script that securely embeds these buttons directly into your page via an iframe, ensuring the assets are always up to date.
Express Checkout button
-
Add a container element to your page where you want the Express Checkout button to render:
-
Initialize
Trustly.renderButtonand attach yourTrustly.establishcall toonClick:
Sign-In button
-
Add a container element to your page where you want the Sign-In button to render:
-
Initialize
Trustly.renderButtonand attach yourTrustly.establishcall toonClick:
Complete HTML example
You cannot run the following example without a valid requestSignature. The SDK will fail to load if this field is missing or incorrect. Before proceeding, use your backend to generate a signature for your test payload. See Generate request signatures to get the code to generate the signature in Node.js or Java.